When you create blog posts in EverWeb you’ll want an easy way for your visitors to navigate from one post to another as well as to the Index and, possibly, archive page. EverWeb’s Blog Posts Navigation Links are the easy way to do this. Here’s how to add and customize navigation links in your Blog Post…
Customizing Your Blog Posts Navigation Links
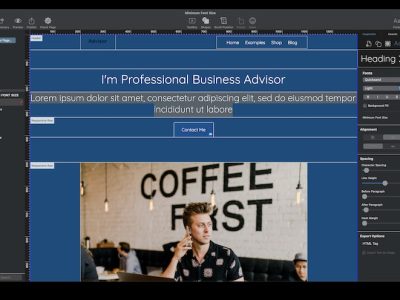
To customize your blog posts Navigation Links, begin by selecting your Blog Posts page in the Web Page List. Next select the Blog Post widget. This ‘widget’ appears in the Blog Post Preview Window and contains the contents of the post itself such as any text and images that you’ve added in to the Blog Post Editor Window. The widget also contains the Blog Post header information.
With the Blog Post widget selected, go to the Widget Settings in the Inspector Window. If you don’t see the Widget Settings, click on the Inspector tab in the Inspector Window and click on the Widget Settings ‘cog’ button.
With the Widget Settings displayed you can now customize the look of your Blog’s Navigation Links. Remember that as you’re changing settings in the Blog Posts Preview Window, they’ll generally apply to all your blog posts.
Display Options
EverWeb displays the Blog Post titles as Navigation Links for the ‘previous’ and ‘next’ posts and a text label, ‘Index’, for the blog main index page. You can toggle these display defaults on and off using the ‘Include navigation links’ and ‘Include index page link’ check boxes in the ‘Post Options’ section of the Widget Settings.
Furthermore, if you want to change the name of the Index page label, just enter the name you want in the ‘Index page name’ box. This action doesn’t change the name of the blog main page itself.
Changing Navigation Link Colors and Underline
After you’ve set how your Navigation Links will be displayed, you can customize the links themselves in a number of ways.
Click on the ‘Navigation Links’ Fonts button in the Widget Settings to customize most aspects of the Navigation Links all at one time using the Fonts Panel. Change the font type, font weight and font size to suit your website style but, leave the color and underline options as they are.
Changing Navigation Links Color and Underline
Blog Posts Navigation Links are, as you’ve probably guessed, hyperlinks, so you change their color and underline properties in the same way as you would for other hyperlink. However, for blog posts, use the ‘Post Link Normal’, ‘Hover’ and ‘Visited’ and Underline toggle options in the ‘Post Options’ section of the Widget Settings. Do not Use the Hyperlinks tab from the Inspector Window.
The changes you make will apply to all hyperlinked text objects you create after the change e.g. if you add a hyperlink in the Editor Window it will inherit the changed hyperlinks attributes.
Changing the Navigation Links Separator Bar
If you want to customize the color of the separator bar between the previous, index and next Blog Post links click on the ‘Navigation Links’ Fonts button in the Widget Settings. This will display the Fonts Panel again. Click on the Text box button in the Fonts Panel Toolbar and change the color from the default black to the color of your choice. The separator bar will change color, but the text of your Navigation (Hyper)Links will remain the color that you set earlier.
Adding A Link To Your Archive Page
If you want to link your blog posts to your archive page, simply add a Text Box, or button shape with text on it, to the Blog Post Preview Window. Use the Hyperlinks Inspector tab to link the text to the archive page. As the hyperlinked text is in the Blog Post preview window, it will be displayed on all blog posts.
Alternatively, you can also add a hyperlink to the archive page on the blog main page. In this case, click on the blog main page in the Web Page List and click on the blog main widget in the Editor Window. In the Widget Settings, use the ‘Show full archive’ section to add the link to your archive page. If you don’t see this in your Widget Settings, make sure that you have EverWeb version 2.1 or higher installed.
Setting up navigation links is easy and versatile, but if you have any questions or problems, let us know below!

Comments