Image maps have many uses within web design such as adding details to a technical diagram or navigating users from a paticular area to a specific part of your iWeb site. Put simply an image map is a large image with several hyperlinks embedded into it. In this tutorial I will show you how to recreate this effect within iWeb.For this example we will imagine that I have several different pages in my site that are dependant on where you live in the world.
To begin with we need to find an image to use as our Image Map. I found this world map which is perfect for the job, so once I have optimized it for use on the web I can insert it into iWeb.
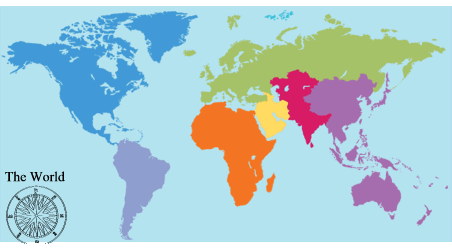
Once we have the image how we want it with iWeb we need to create the pages that the image map will link to within iWeb.
As I mentioned above I want to have a different page depending on where the iWeb site’s visitors come from so I create pages for Europe, USA, and Asia and just add a heading for now; details can be added later. Obviously you can create as many pages as you need, such as one for Africa, Australia or the North Pole for example.
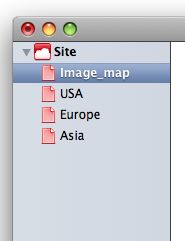
Going back to our page containing the image map we now have to draw the areas onto our map image that tie in with the new pages.
Go to the Insert menu and select Shape or select the ‘Shape’ icon from the bar at the bottom of iWeb.
Scroll down until you find a shape that closely resembles the area you want to mask and select it (you may have to use 2 shapes on some areas).
Draw the shape onto the image map to cover the first area as required. You may want to open Inspector, select the ‘Graphics’ tab and, with the shape selected set the opacity to 40% or so to help you closely match the required area.
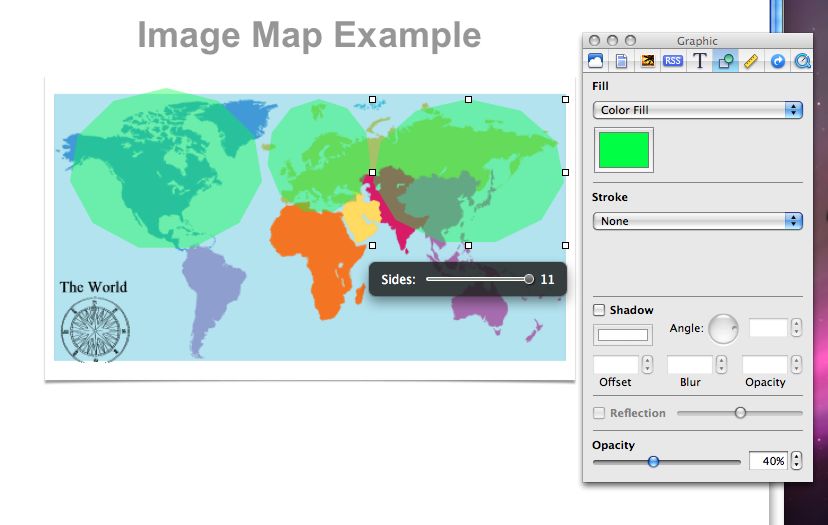
Repeat this step for the other areas taking care to ensure the shapes do not overlap.
To take into account the different browsers and the way they interpret CSS rules it would be advisable to leave a bit of space between shapes to allow for the padding/margins that are created automatically by iWeb.
Select one of the shapes once more and go back to Inspector. Choose the ‘Hyperlink’ tab and tick the box to enable the shape as a link.
From the drop-down menu choose ‘One of my pages.’ and select the page that corresponds to the shape you are linking to.
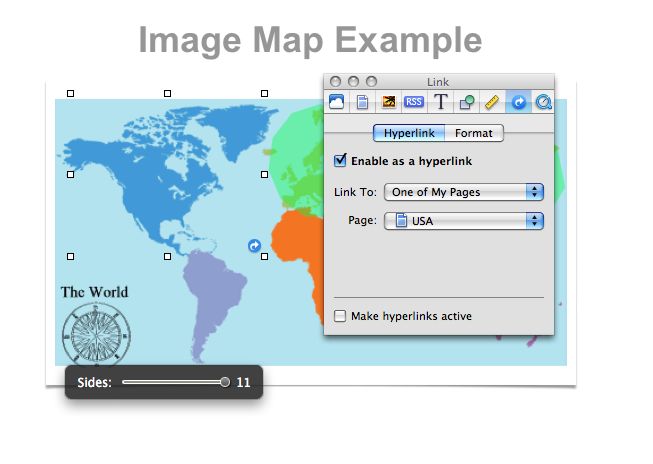
Now reselect the ‘Graphics’ tab and change the fill opacity to 0% and set the border to ‘None’. The settings I used are in the image below. Once the hyperlink is created iWeb creates a small blue icon containing a white arrow in the area of the shape so that you know a hyperlink is there. It does not show when the site is published.
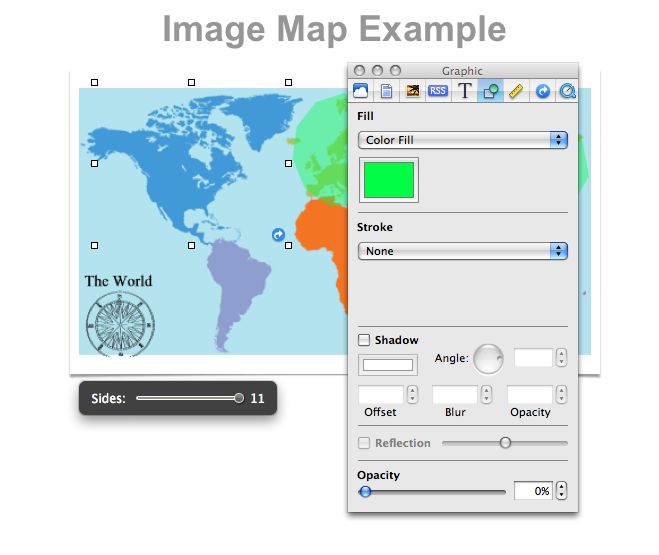
Repeat the last 2 steps for all of your other shape-links and you’re done. One fake image map produced in iWeb.
Of course you don’t have to just use it for a world map as ihave done; if you have a fancy image based nav-bar you could use the same method to create the links from that.
If you have used this tutorial why not let us see, leave your URL in a comment.






Will the pages you make also show up in the site menu?
I’ll have a image of a map over on region, and some places there are activities that I’ll have a new page to show.
Ole,
That depends on whether you take the tick out of the box in Inspector, to show (or not to show) in your nav-bar.
Tim
Thanks so much for this! This was exactly the information I needed and you really made it simple to understand.
For the map example, you could use the alpha and mask options to make the image map more defined. I love iweb.
Thanks for all the help!
Well done! Thanks a lot! I was starting to hate iWeb but now you’ve made me change a wee my opinion about it 🙂
Thank you so much for this, I’ve been trying to use the damn HTML Snippet for my image mapping, I was getting SO PISSED!!
THANK YOU THANK YOU THANK YOU!
Is it possible to highlight an area with another colour?