
 By
By In the first part of our exploration of EverWeb 4.5’s new User Interface features we looked at the some of the changes to EverWeb‘s workflow: Saved State, object placement in responsive pages, and updated Container capabilities. Continuing from where we left off last time, let’s look at some more of the important UI changes to be found in EverWeb 4.5…
Naming Objects
Although not a new feature in EverWeb 4.5, object naming has been expanded to almost all objects and object types. This is very useful for when you have complex designs that use similar, but different, objects e.g. you might have a number of TextBoxes on your page. Instead of them being called TextBox 1, TextBox 2, etc. you could name each TextBox to make its function more specific e.g. ‘Q1 Sales Intro’, ‘Q1 Sales Body Text’, etc. The important thing to remember here is that if you need to reference different objects a lot in your page, it’s better to give then an easy to remember unique name. If you’re using a responsive page layout, it’s usually a good idea to name each page section for easy reference later on.
Naming and renaming an object is easy, just double click on the object’s name in the Object Label Toolbar, and change the name as desired.
Embedding Objects
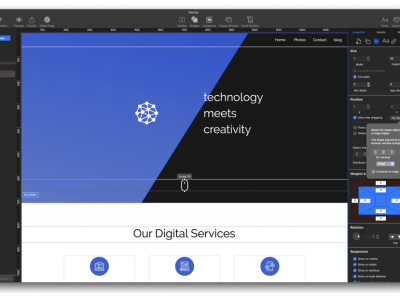
Objects, objects, objects! EverWeb 4.5 gives you more control over objects than ever before, but it may also be more frustrating manipulating them. Once you get used to how EverWeb now works, this will become second nature. The changes to EverWeb are also more noticeable when using Responsive pages. Let’s take adding a TextBox to a responsive page as an example. When you do this in EverWeb 4.5, the TextBox will be added as a free floating object as ‘Allow Free Dragging’ in the Metrics Inspector is set on. You can, therefore, move the object to where you want on the canvas, just like you would in a fixed width page scenario. The difference on a responsive page is that the TextBox is pinned to the page making locating it easier. In many instances, though, you will probably want to embed the TextBox either in to a Container or Responsive Row widget. To add such an object in to any of these container types, secondary click, or right click, on the TextBox, then select Embed In from the menu. Choose the Container or Responsive Row from the list. When you do this, notice that the TextBox is embedded but with Allow Free Dragging still set on. Deselect Allow Free Dragging if it’s not needed.
There may also be times that you actually want to take an objet out of a Responsive Row widget or Container, for example, if you have misplaced it within one of these container types. Again, click on the object, then select Remove from Responsive Row/Container.The object is now free floating with Allow Free Dragging set on, so that it remains pinned to the page even though it’s now out of the container it was previously in.
Selecting Child Objects
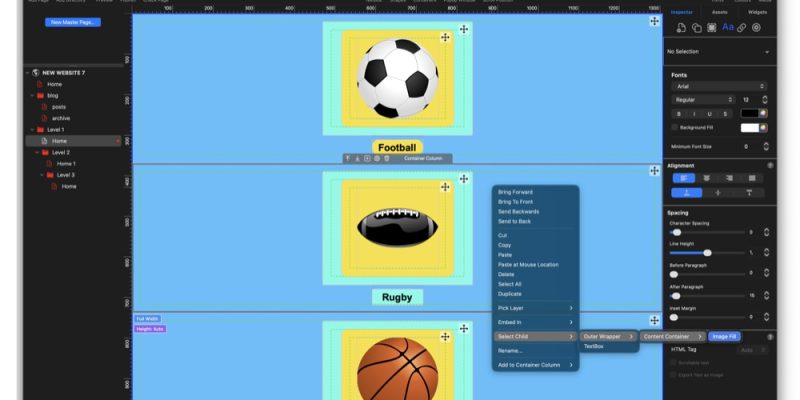
When you are using nested Containers there’s now a handy option for you to be able to select a Container that’s within an outer Container. For example, say that you have three Containers nested within each other. Click on the outermost Container. Next right, or secondary click on it. You’ll see on the list of ment options that there’s a Select Child option. When you mouse on this, you will see that the next two levels of Container can be selected. Just click on the Container that you want to focus on. This is a useful option to know about, especially if you find selecting child containers difficult in a complicated design.
Key Information Displayed
One of the useful, but subtle additions to EverWeb 4.5 is that it now gives you more information about an object in the Editor Window for objects in a responsive page. Check out the outside bottom left corner of an object. For example, if you add a Container to the page, you may see one or two information boxes displayed depending on the settings used for the Container. An info box with a light blue background will show you if the object is Full Width. It will also show you Minimum and/or Maximum width settings for the full width object if they have been set. The second type of info box that you may see will show you if the height of the object has been set as ‘fixed’ or as ‘auto’. This info displays in an info box with a pink background color.
Auto Height and Fixed Height
Another feature that you’ll see more of is Auto Height/Fixed Height. Typically you’ll see this setting in Containers and widgets. Usually the height of such objects will be set to auto. In the case of Containers and widgets, such as the Carousel widget, when you drag and drop and object, such as an image file, in to them, the height of the Container or widget will adjust automatically if needed to accommodate the incoming object. There may be instances where you want to set the height to fixed so that you can hardwire the height yourself. Don’t forget that you also can use Margins and Padding as well if needed. to change an object’s Height, go to its Widget Settings, or click on the Settings Cog in the object’s Object Label Toolbar then use the Height menu option as desired.
Smarter Widget Placement
When you place a widget on to the page it will now automatically place itself intelligently on the page. As you would expect, if a widget is full width capable, it’s going to be added to the page as a full width object. When if comes to fixed width widgets, such as the PayPal Modern widget, the widget is not placed more intelligently on the page, more in keeping with where you drop it with the mouse. It’s a small but welcome change.
EverWeb’s new workflow gives you a lot of design flexibility. It may a little time to get used to the new paradigm, but it’s worth it for the benefits that it will give to your page design!




 Loading ...

Comments