EverWeb comes with a couple of features that help you easily create dynamic web pages. ‘Fixed Position’ is a great example of a feature that can be used to give your website a fresh, robust appearance. The feature let’s you fix an object in place along the horizontal axis enabling you to produce some cool effects for your web pages. Add in EverWeb’s ‘Always On Top’ and ‘Full Width’ features and you get even more possibilities. Here are three examples of how you can use and combine some of these features to good effect…
Vertical Buttons
Many websites have buttons vertically set in place, especially for Social Media purposes, so that as you scroll down the page the buttons stay in place and visible at all times. It’s easy to create this type of effect in EverWeb. In our example we go one step further by creating a pager with placeholder buttons and pictures fixed in place to create a fixed pane on the left and a scrolling pane on the right of the page…
- To start, you’ll probably want to add the buttons to a Master Page so that they can be used throughout your website.
- If you haven’t done so already drag and drop the buttons you want on the page e.g. down the left hand side.
- Use the Arrange-> Align Objects and Arrange-> Distribute Objects menus to help properly space and align the buttons.
- When placing the buttons remember to keep the left hand gutter of the page clear of any other objects so your buttons don’t bump in to anything as you scroll up and down the page.
- When placing a button check the ‘Fixed Position’ box in the Metrics Inspector tab to keep it in place as the page scrolls.
- When you come to preview the page, if you find any of the buttons obscured, this may be due to another object on the page ‘floating’ above the button and hiding it. This can happen when you have a Master Page attached to a regular page. Master Page objects lie beneath regular page objects which float above them sometimes causing objects, in this case the buttons, to be obscured. Use the ‘Always On Top’ feature to manually float any obscured buttons to the top of the page. This feature is on the Arrange menu and the Metrics Inspector.
The effect is shown below…
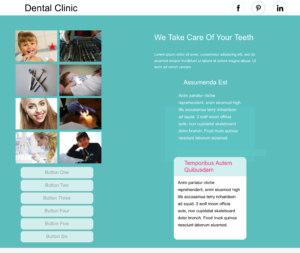
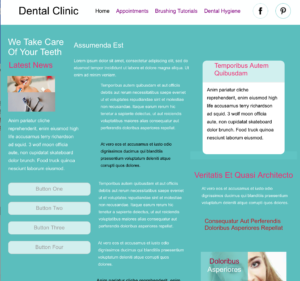
The vertical scroll pane is on the right with the buttons and pictures fixed in the left hand column
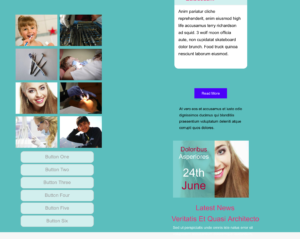
Vertical scrolling in action with the right pane scrolling up and the left pane remaining fixed in place
Creating a Split Horizontally Scrolling Page
Fixed Position can be used to set up a horizontally scrolling page where the left hand side remains fixed and content slides behind it when you scroll to the right. This type of effect may be something that is effective for mobile environments. To make such a page…
- Set the page Content Width to a wider than normal value in the Page Inspector, e.g. 2000 instead of 1000 to create a two page width effect.
Once you have increased the Content Width value, you may have to reposition objects that were already on the page back in their original position, especially objects that are in the header and footer areas as they may have become displaced. In our example, the social media buttons were displaced, so they been moved to the left and set with a Fixed Position within the original Content Width of 1000, so creating the illusion of a two page effect. - If you are creating this effect for a mobile device, you may want to also adjust the Content Height so the page stays ‘fixed’ stopping a visitor from trying yo scroll up and down as you want them to scroll left to right.
- To create the effect, add a rectangle that is the length of the page and color it to contrast with the page background.
- The rectangle shape has been set to ‘Fixed Position’ before the pictures and buttons are added on top of it. All of these objects should also be set up as Fixed Position. It’s also recommend that ‘Always On Top’ is set for all of these objects to guarantee that they always float above everything else placed on the page.
When you create the page you may find Bring Forward, Bring to Front, Send Backwards and Send to Back useful in floating objects on the page to the ‘depth’ that you want them. - In addition, EverWeb also has a great little feature called ‘Pick Layer’ If an object is obscured by another, hover the mouse over the object and perform a secondary click (double tap). On the sub menu you’ll see the Arrange menu options that were just mentioned. At the bottom of the menu is the ‘Pick Layer’ option. When you hover over this option you will see a list of all the layers that exist along the z-axis at that location. Select the layer you want.
When creating your double page effect it’s best to work in columns so that you separate one screen width from the next. You may want to test this on your desktop or mobile device to see how the effect works in practice. You can see how the effect looks in the two screenshots below.
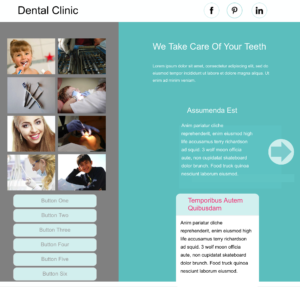
Horizontal Scrolling at the start position. On the Left is the dark rectangle which the contents to right will slide underneath.
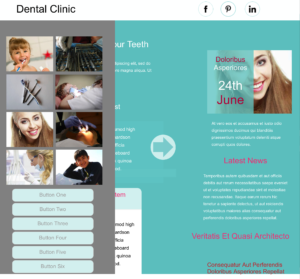
The contents of the page slide under the section on the left which is fixed in place using Fixed Position
Creating A Picture Scroller
Our third example is one where you create a scrolling picture view. In this example, as you scroll down the page, the text on the left hand side of the page remains in place, but the picture that is embedded in the text changes as you scroll up and down the page.
To create the effect…
- Select the pictures you want to use. Make sure they are the same size as each other.
- Next arrange the pictures in a column with no gap between the pictures.
- Fix Position the picture column. Once you have done this, it may be an idea to group the pictures together using the Arrange -> Group menu so they remain as a ‘unit’.
- Now create a rectangle shape in the same color as the page background. Shape the rectangle so it’s the same width as the picture column.
- Place the rectangle at the bottom of the first picture and extend it downwards to hide the rest of the picture in the column that may be visible.
Once the rectangle is in place fix it’s position and set ‘Always On Top’ on. - To complete the effect, duplicate the rectangle shape. Duplicating is better than creating a new shape as you retain all of the original shape’s attributes. Place the shape above the top of the first picture. so the bottom edge of the rectangle meets the top edge of the first picture. The top of the rectangle should be extended to the top of the page.
- The effect is now complete as can be seen in the screenshots below. You can test out the effect whilst in the Editor Window. When scrolling down the page, make sure that the picture column does not reappear over the top of the page.

The picture scrolling effect at the start position
When the page is scrolled some text moves in the center of the page and the picture scrolls to the next one in sequence
When creating effects such as those above, always remember if you are creating for mobile or desktop devices as the results may look good on one type of device and not on another. It’s also worth remembering to Preview your web pages to check that you don’t have any scrollable objects bumping in to fixed objects or that you don’t have hidden objects suddenly becoming visible. There are many more possibilities with Fixed Position and the related Always On Top and Full Width features in EverWeb!


Comments