![]() There are many ways to display images on your iWeb site, by no means least the default photo page that comes with every theme, but what if you want something different? Lightbox has got to be one of the most popular ways of displaying images on a web-site available at the moment. Not only does it provide a slick way of showing off your photographs or illustrations but it looks really cool to boot. So here is how to add lightbox to your iWeb site in order to create the perfect looking image gallery or portfolio.
There are many ways to display images on your iWeb site, by no means least the default photo page that comes with every theme, but what if you want something different? Lightbox has got to be one of the most popular ways of displaying images on a web-site available at the moment. Not only does it provide a slick way of showing off your photographs or illustrations but it looks really cool to boot. So here is how to add lightbox to your iWeb site in order to create the perfect looking image gallery or portfolio.
Before I start this tutorial, I want to start with a warning. This iWeb tutorial involves editing the HTML code of your iWeb site. Hopefully, you will find the way I have explained it below easy to follow, but if you are not happy with editing the code stick with the default photo page.
The first thing to do, before you even open iWeb is to decide which images you want to display. Gather them all together and stick them in one folder. This step isn’t vital but I found it does make things a lot easier in the long run. When I was writing this tutorial I copy/pasted 4 images onto my desktop.
Once you have your images organized it’s time to open iWeb. Open a new blank page, give it a suitable name (but NOT lightbox; I called mine ‘gallery’) and one by one start adding the images to the page. Size the images to look like thumbnails, add the borders (if necessary or desired) and get the page how you want it to look.
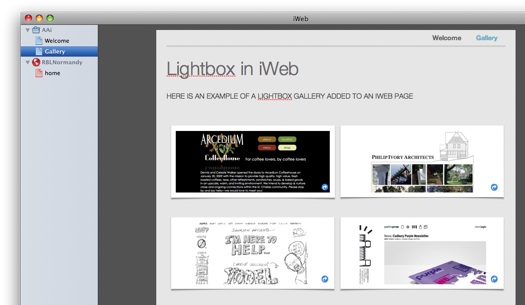
Open ‘Inspector’ and select the ‘hyperlink’ tab (the blue circle with the white arrow). Now one by one add a hyperlink to each image back to itself by choosing ‘A File’ from the drop-down menu and navigating to the folder where you collected all your images (told you it was a good idea!)
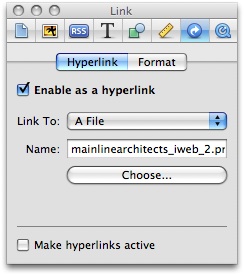
Once you have added hyperlinks to all your images, publish your iWeb site ‘to a folder’. This will create your iWeb site and save it on your hard-drive in a location you specify; we do this so we can edit the HTML before publishing to our web host (or MobileMe).
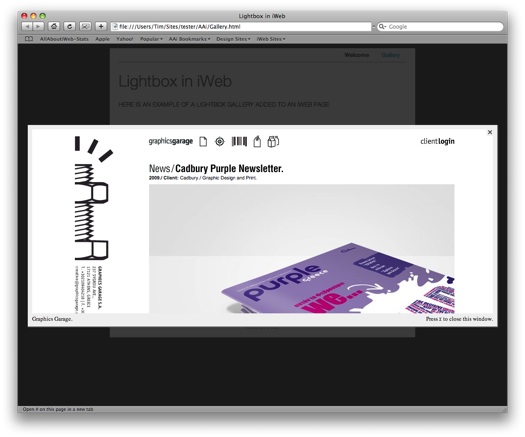
Now navigate to the folder where you saved your iWeb site. Normally iWeb will save it in the ‘Sites’ folder of your ‘Home’ directory. Open the folder that contains your site and you will see a small thumbnail of the page you created and next to it should be a folder of the same name but with ‘_files’ added to it. See my image below for my Gallery page example.
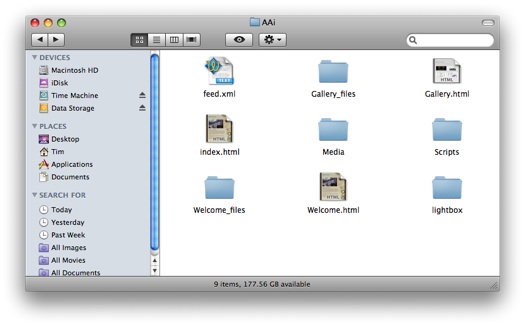
First of all we have to put the lightbox files into our site (see above). All of the files that you need are saved in this archive lightbox.zip which you are free to download. Once you have downloaded it, extract the folder and put it with all of its contents into your site folder (NOT your page’s folder).
Just for your information within the folder you have just downloaded are five individual files;
- lightbox.css – this controls how the gallery styled.
- lightbox.js – this controls how the gallery works.
- 3 x image files to give the gallery it’s look.
You don’t have to edit these files.
So now that you have copy/pasted (or drag/dropped) the lightbox folder into your sites folder it’s time to edit the page you created earlier. There are 3 sections we have to edit in total but they are all a case of adding extra bits of code.
Right-click (Ctrl-click) on the page you created and open it in the text/HTML editor of your choice. I use TextWrangler. The first part of the page is called the <head> section and this is where the first bit of code must be added to tell your iWeb page that we want to use lightbox.
Scroll down slightly until you see the bit of code </head>, and insert the code shown below on the line above it.
<link rel="stylesheet" href="lightbox/lightbox.css" type="text/css" media="screen" />
<script type="text/javascript" src="lightbox/lightbox.js"></script>
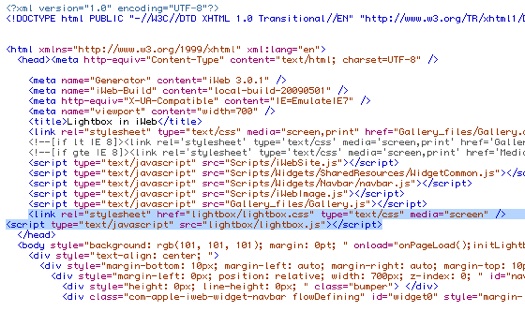
That’s part 1 out of the way.
Just below the end of the <head> section is the <body> section of your iWeb site and the line should begin:
<body style="background.......
Further along that line is the following code:
onload="onPageLoad();"
After the semi-colon you need to add:
initLightbox()
so it looks like:
onload="onPageLoad();initLightbox()"

And that is part 2 out of the way.
Finally we need to make sure that our image hyperlinks know that we want them to display in lightbox too. This is done by adding a small bit of code to each link.
Scroll down and you should start to see your image links. Each image is separated into its own ‘Div’ and there are lots of height and width measurements followed by a bit of code that starts:
<a href="foldername/image_name.png".......
Obviously foldername and image_name will depend on the name of your folders and images, but following this little bit of code (and for each image) you need to add the following bit of code:
rel="lightbox"
Once you have applied that to all of your image hyperlinks we are almost ready to view our site. Before we do though, further along from where you just added the last bit of code, and on the same line you will notice a piece of code that begins:
title="......
The bit of text that is between the quotation marks is what will show underneath your image when the lightbox viewer is working. You don’t have to change this text, but if you want to give your images individual titles (this also helps with SEO in a very slight way) then now is the opportunity. You can type anything you want in between the quotation marks but try and keep it short and sweet. If you leave it as it is then the path name to your image will be displayed. If you don’t want any caption then just delete the text between the quotation marks.

That is it. You should now have a working lightbox viewer added to your iWeb page. You should save the page in your HTML editor and go back to your site folder. Double-click your ‘gallery’ page and it will open in your default browser where you can test it out. You may well not see the default ‘loading’ graphic as the images are all stored on your Mac and so it is quicker than the Internet (obviously).
You can now publish your site with an FTP app (such as CyberDuck) if you se your own host or by copy/paste (drag/drop) to the ‘Sites’ folder on your iDisk if you are on MobileMe.
If you have followed this iweb tutorial and added a lightbox gallery to your iWeb site, why not leave a comment below with a link so we can take a look.
Want more? Try my ‘Adding Lytebox to iWeb sites’ tutorial too.





brilliant tutorial.
I did everything in the tutorial but it doesn’t seem to work, I’m not sure what it is I’m doing wrong.
Let me start by saying this is a very well put together tutorial, but I am having trouble making the HTML stick after saving. Once I edit it on TextWrangler and save, it appears to work while previewing. However, once I publish to my folder and to the FTP, the HTML goes back like it was before editing it. Any ideas?
Hey Tim
Like a few people Iv managed to make the script work via HTML but am having trouble with how to bring those pages back into Iweb. So far I cant seem to find how. Could you or any one help with this problem?
Kind Regards
Jake Brennan
Did you ever get a response for your question? I’m having the same problem.
Thanks.
Terrah
thank you so much for this. well written and easy to follow
I have followed the steps, explicitly. I published to a folder, opened the html page for the bus features page, made the appropriate changes, saved over it then uploaded it all from the folder using iWeb SEO Tool. When it publishes the light boxes don’t work and the source code doesn’t show any of the additions I made. What am I doing wrong?
Thank you in advance.
Best,
T
Hello Tim,
Is is possible to get a form in lightbox?
Thanks in advance!
Mark
Hi Mark,
No not in this version. Sorry. But there are other lightbox clones out there which you can do, and you install them the same way as this.
Tim
hello….thanks a lot for this amazing tutorial….everything worked perfectly….i havent applied it to the web site yet cause i have one question: Is there any way i can take the “press x to close this window” text on the bottom righto of?
thank you very much for your help,
Norman