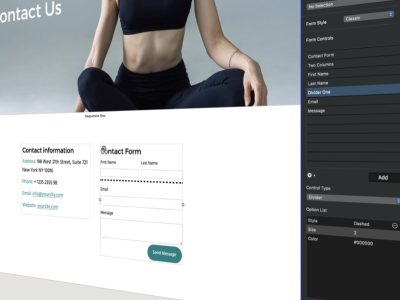
EverWeb’s Preview feature lets you see how your website will look in the any browser that’s installed on your computer before you publish your site to the Internet for the world to see. Just hit the Preview button in the Toolbar or use the File-> Preview menu option and select the browser of your choice. EverWeb will generate the code required and show you the results locally in your web browser.
Any browser installed in the Applications folder of your Mac will be available to EverWeb’s Preview. This is great for testing purposes as you’ll want to make sure that your website works properly in the most popular browsers. If you add additional web browsers to the Applications folder they will become available in EverWeb the next time you launch the app.
When it comes to testing the mobile version of your website, things get a little bit more difficult. For a start, there are thousands of different Android devices out there, with different screen dimensions running different versions of Android. This in itself makes testing difficult although some web browsers help out by providing some basic mobile phone preview facilities to help which we’ll cover in a future blog post.
Testing your website on Apple devices is a lot easier as there’s a more limited range of mobile devices on offer. It’s also easier as most users update iOS to the latest iOS version as new versions become available, so there are fewer legacy versions to test your website on.
Apple also helps out by supplying a tool in its Xcode programming environment: Simulator. This app does just what it says as it simulates Apple’s supported mobile hardware as well as tvOS and watchOS. Simulator can mix and match supported hardware with supported OS software so you can test exactly what you want, everything is in one place. And the great thing is that Simulator is free to use.
How To Install and Setup Simulator
Installing and setting up Simulator takes a few steps:
- Go to the Apple Developers Website https://developer.apple.com
- Select the ‘Develop’ menu option and then click on the Xcode icon.
- On the Xcode page, click on the ‘Download’ button to download Xcode which contains Simulator.
- You will then be asked to Sign In to your Apple ID and enter your Apple ID password.
- If you do not have an Apple ID, click on the ‘Create Apple ID button’ and follow the steps to create an Apple ID.
- Once you have signed in, you can select the version of Xcode that you want to install. It is usually best unless you are a developer to install the latest official version of Xcode and not any of beta versions that may also be available for download.
- You will be redirected to the Mac App Store where you can now’Get’ and ‘Install’ Xcode to your computer. When doing so you will also need to enter in your Apple ID password again.
- Xcode will then be installed. As Xcode is a development environment it will take time to download as it is about 5.9GB in total.
- Once downloaded, launch the Xcode application as this automatically installs all of its components including Simulator. Once done you can close the Xcode app.
- As Simulator is part of Xcode, you won’t see it in the Applications folder, you’ll only see Xcode listed. You can, if you are tech savvy, open Xcode’s Package Contents and to the Simulator app and create an alias for it that can then be moved to the desktop making it easier to launch the app on its own without having to launch Xcode.
- If you have EverWeb already open, close and relaunch the app. Open your website project file and you will see that Simulator now appears on the Preview menu and on the Preview Toolbar button.
Simulator and EverWeb
Working with Simulator takes a bit of getting used to. It can be a little bit temperamental and sometimes crashes. As it is also simulating iOS it can also a little slow in loading and can take some system resources. With that in mind here are our recommendations on how to use Simulator:
- Publish your website to a folder location on your hard disk. When the publish is complete select “View Site Now”. Copy the URL link in the web browser to the clipboard.
- To open Simulator, click on the Preview button in EverWeb and select Simulator. The app will launch. This may take a few moments depending on your computer hardware.
- Depending on your version of EverWeb you may find that you get a browser window with your website previewed as well as Simulator opening.
- When Simulator opens, it will load up iOS so it may take time before you see anything on screen in Simulator. Once the iOS Home Screen is visible click on the Safari button and then paste in the link that you copied earlier to the clipboard. You can now navigate around your website.
- You can change the OS and hardware you want to display your site on by using the Hardware-> Device menu.
- To scroll on the device you are simulating, click and hold one finger on the trackpad (or mouse) and use a second finger to swipe up and down to scroll.
Using Simulator can have its challenges, but it does offer benefits when testing your website. There are also other tools that may provide easier alternatives and we will be looking at these in a blog in the near future!
Let us know if you have a question about EverWeb and Simulator in the Comments section below!


Comments