The Responsive Row widget debuted alongside the new Responsive Page Layout in EverWeb 2.9. The widget is one of the cornerstones of responsive website design in EverWeb as it acts as a wrapper within which you can place objects. Typically these objects will be fixed width, such as the Audio, PayPal and FaceBook widgets, although there are also plenty of times where it’s ideal to use the Responsive Row widget with responsive widgets and full width objects as well.
Given the nature of Responsive Web Design, it can be frustrating for those coming from a fixed width website design background to work within a seemingly more restrictive design environment. Fixed width websites allow much more design freedom, whilst responsive websites by necessity are more rigid in approach.
So how can you add some design flair to your responsive website whilst using the Responsive Row widget? Here are some ideas to help spice up your website design…
Background Images
One great way to add interest to your pages is to set a background image. You can set an image for the Browser and/or Page Background in the Page Settings tab of the Inspector Window. You can also add a background image to the Responsive Row widget. First select the Responsive Row widget, then go to the Shape Options tab. Change the Fill type from ‘None’ to ‘Image’. Next, select the image file that you want to use as the widget’s background using the ‘Choose’ button. Once the image is in place, use the image dropdown menu to get the look that you want i.e. Scale to Fill, Scale to Fit, Stretch, Original Size or Tile.
Use Tiled Images
Tiled images in the Responsive Row widget can great for adding some flair to the Responsive Row widget. For example shapes such as circles, squares and triangles, when tiled, can create really interesting effects. You’ll need a graphics editor for such a task e.g. Pixelmator, Affinity or Adobe Illustrator or free to use Gimp.
Make sure that when you create your tiled image that its height and width are the same e.g. 100×100 pixels. Also remember that you can scale up your tile design as well e.g. 200×200 pixels or 400×400 pixels. The larger the tile, the larger the tiled background image e.g. if you have a dot in a 100×100 pixel tile, your tiled background will have many small dots. If you use the same design at 400×400 pixels, you’ll have fewer, larger dots. Just remember to increase the size of the dot in the tiled image when scaling up!
Tiled images are not just restricted to shapes, only to your imagination! If you create a unique tiled design, make sure to test it for all device type to make sure it remains consistent.
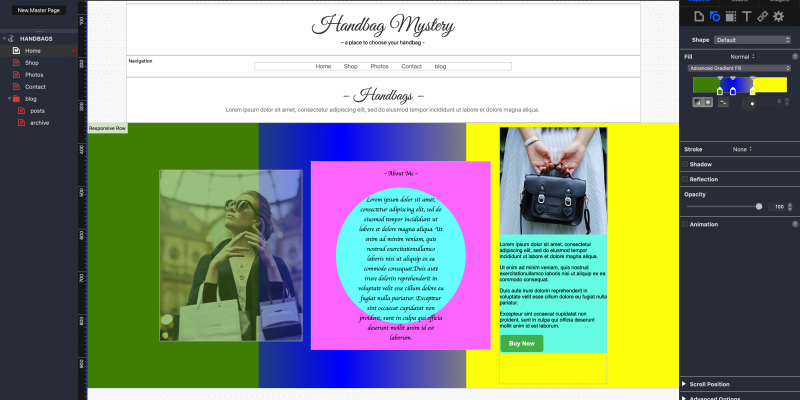
The Advanced Gradient Fill
The Advanced Gradient Fill option on the Fill dropdown menu of the Shape Options tab is a great way to use color in a Responsive Row widget. Just like the Gradient Fill option, you can use the Advanced option to add a gradient background to the Responsive Row widget. The Gradient Fill option only allows you two colors and is limited in what can be achieved. The ‘Advanced Fill’, though, allows for as many colors as you want and has more effects options too. When you select the Advanced Gradient Fill option, you’ll see dark grey at the left end of the scale bar, white at the right end and all the graduations between the two colors in between. There are two markers at the bottom of the scale bar. If you click on one of the markers, the color picker will appear so that you can change the marker’s color. Slide the markers left and right to change how far each color extends. You’ll also notice a slider on the top of the scale bar. This controls the gradient between the two colors. Adjust this between the two colors to see the effect.
Using the Advanced Gradient Fill means that you can use as many colors as you want. Just click on the bottom of the scale bar to add a new color marker. To remove the marker just drag it under the scale bar. The Advanced Gradient Fill is also where you can make gradient colors solid! To do this, first change the colors of the two markers e.g. to blue and yellow. Next position the gradient slider at the top of the scale bar above one of the colors. Finally, move the two color markers on top of each other. Both colors will become solid. Using this method is a great way to have solid colors that work consistently in a responsive design whichever device you display the page upon.
Use Backgrounds for Objects Within the Responsive Row
One really useful feature that came to EverWeb in version 3.0 was that most objects can now use Shape Options Fill and this is really useful to remember when adding objects in to a Responsive Row widget. For example if using the FlexBox widget you can add an oval as the background using the Advanced Gradient Fill. Use two colors only and choose the circle option (the second button from the left under the scale bar) to create the effect. Move the color marker of the oval left and right to make the oval larger or smaller. Adjust the width of the object itself to make the oval more or less circular.
Use Some Animation Inside the Responsive Row
Animation can create some great effects and add some motion to static pages. You can use animation with the objects that are in the Responsive Row widget. Slide from Top and Slide from Bottom effects can give your images more focus and impact, whilst Flip Vertical is useful when you want to call out images and text at the same time. This effect is effective when working with the FlexBox, Text Section and PayPal widgets.
Animation effects should be used carefully as the idea is to draw attention to one or two objects on the screen, not to create a visual frenzy where the visitor has no idea what to focus on.
Although these tips apply to the Responsive Row widget, many of them can also be applied in many other areas of EverWeb as well.
If you have your own ideas about being more creative with the Responsive Row widget, feel free to share your thoughts with everyone in the Comments section below!


Comments