The widgets that you use in EverWeb are like small mini-apps that help you to add features in to your site’s pages such as PayPal payments, contact forms, social media links such as FaceBook, image galleries and so forth. In addition, widgets also help you craft the pages of your site adding design flair using widgets such as the FlexBox and Text Section widgets. Whilst widgets are straightforward to use, there are some things that can help you be more productive, and efficient, when using widgets. Here are our tips on how to get the best out of EverWeb’s widgets…
- Use ‘Auto’ When Setting Image Size. If you’re using widgets such as the Text Section widget, you can add images in to the widget via the Widget Settings. You can adjust the width and height of images as well, which is fine, but this can become a manual, tedious task, especially if you want to keep the proportions of the image in tact. So instead of having to work out the height or width of the image manually, just set the width that you want, then enter the word ‘auto’ in the height field. EverWeb will work out the correct height for you so that the image retains its proportions.
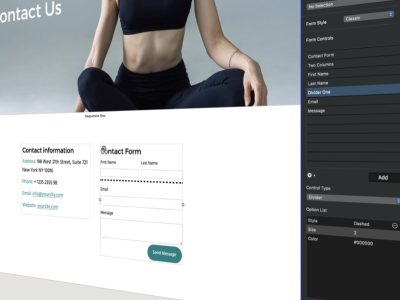
- Adding a Background Color to a Widget. Why not give your widget a color or image background? It’s easy to do and most widgets, such as the Contact Form Advanced widget, support this feature. First select the widget in the Editor Window, then go to the Shape Options tab. Select Color Fill from the Fill section’s dropdown menu, then use the Color Swatch or Color Picker to choose the background color you want. Alternatively you can choose other Fill options as desired.
- Change Multiple Widgets All At Once. In more recent versions of EverWeb (we recommend version 3.9 or higher), you can now select multiple widgets of the same type on the page, then apply a change to one of them which will then change the other selected widgets as well. This will save you time, for example, if I have two Text Section widgets on my page and want to apply a Maximum Content Width of 600 to both, all I need to do is select both widgets and change the Maximum Content Width once to 600 in the Widget Settings. The other selected widget will inherit the new value as well. Please be careful when using this technique on widgets such as the PayPal widget. Once you have made the change you desire, deselect all of the selected widgets before continuing so that you do not inadvertently make unwanted changes later!
- Selecting Assets in Widget Assets Lists. Different widgets have various lists such as the Form Controls list in the Contact Forms Advanced widget or the Assets List in the Responsive Image Gallery widget. Where you have objects in any list like this, you can select and move them up and down the list simply by selecting the object then drag and dropping it to the desired location in the list. If you hold the Shift key down when selecting multiple objects in the list, then you can select objects that are one after the other. You can then move these selected objects all at the same time. Alternatively, hold the Control key down to select objects that are not next to each other (e.g. you want to select the first, third and fifth objects in the list and not the first, second and third in the list). This may be useful, for example, when you want to delete a number of objects from the list all at once.
- Where To Use Content Maximum Width? In EverWeb you may have noticed the Content Maximum Width option in the Metrics Inspector. You may also have noticed that some widgets also include this option. What this option does is that it imposes a limit on the width of the selected object. You would usually use this option with full width responsive objects e.g. the Contact Form Advanced widget. If you drag and dropped this widget on to a responsive page in EverWeb, it would display at full width. This typically is not desirable, so you would use the Content Maximum Width option to set a maximum width for the object e.g. to 600 pixels wide. Where you actually set this setting is entirely up to you. You can use either use the option in the Metrics Inspector or the option in the widget itself if’s included in the widget. You only need to enter the value in one place though. You don’t need to do it in both the Widget Settings and the Metrics Inspector.
- Don’t Forget Your ALT Text! Many widgets feature an option to add ALT Text for images. This is something that’s good to get in to the habit of doing. The main purpose of ALT Text is to display text when the image cannot be displayed in a browser window. So make sure that the ALT Text you use describes the image adequately. Secondly, ALT Text helps those who are vision impaired, so make sure that the ALT Text description you use makes sense to someone who is either reading it or is having the text read to them. Thirdly, adding ALT Text can have a possible uplift to your site’s SEO, but make sure you don’t sacrifice the meaning of ALT Text for your site’ SEO.
- Checking Your Third Party Widget’s Version. There may be times when you want to know if the third party widget you’re using is compatible with the version of EverWeb you’re using. You can easily find this out from the Widgets tab. Once you have selected the Widgets tab, go to the third party widget in the list that you want to check for compatibility. Next, right, or secondary, click on the widget then select ‘About’ from the menu list. You will see the minimum version of EverWeb that the widget is compatible with displayed.
- Drag and Drop Images On To Your Widget. If you are using EverWeb 3.9.5 or higher, you will be able to drag and drop images on to widgets that support the use of images in them. Usually you will have your images in the Assets List already but if you don’t you can use this option. Either drag and drop the image you want to use onto the widget in the Editor Window, or drag and drop the image on top of the Widget Settings of the widget. If you find that this method does not work, you may need to check the box in the Widget Settings that says you are using an image in the widget e.g. in the Text Section widget, check the box next to ‘Use Custom Image’. When you drag and drop an image on to the widget itself, or onto the Widget’s Widget Settings, it will be automatically be added to the Assets List so it can be used throughout your site.
Using EverWeb’s Widgets with these tips should help save you time and effort when building your site! And don’t forget that there will be moe widget news with the upcoming EverWeb 4.0 which we hope will be available soon! Stay tuned for more news on the upcoming release!
If you have any comments or tips about widgets that you would like to share with others, please let us know in the Comments Section below!


Comments